My DIY Dress Form!
Hi Everyone!
Thanks for stopping by my blog! Today I’m sharing with you my review of Bootstrap Fashion’s DIY Curvy Dress Form. I took several photos along the way so you can see what the process was like (scroll to the bottom to see), but I’m not one to reinvent the wheel, so this is not going to be a tutorial. If you’re looking for a tutorial, you can find the one I followed along with here.
Thanks again and happy reading! Oh and if you’re looking for another helpful review with some great tips, check out Michele’s review here. Hers is what made me absolutely want to buy this pattern!
Pattern Description:
This is a pattern for a pinnable customized dress form that you stuff yourself. It allows you to replicate not just your body measurements, but also your posture so that you can fit your own body more accurately. It also helps with draping, pattern drafting, etc.
You need SEVERAL materials besides just fabric for this project, including a stand, a pvc pipe, sponge or foam, glue, interfacing, cardboard and Polyfill (or some sort of stuffing). I happened to have most of these materials on hand because I’m a crafter for life lol. But I did need cardboard, which my husband grabbed from the dollar store in the form of a tri-fold posterboard, and I ended up needing additional stuffing, so we picked that up from Walmart.
I chose to make this pattern because most of my fitting challenges are on the back of my body and I thought this would make my life a little easier in the fitting department. Fingers crossed that I’m right!!

Pattern Sizing:
The sizing for this pattern is fully custom. First, you choose between Missy Fit” or “Plus Size'“ (Curvy). They have a diagram that shows the difference between the two, and you choose whichever you think looks more like your body. I chose the plus size even though I don’t usually wear plus size clothing. My body is definitely curvy and looks more like the plus size diagram, so that’s what I went with. After that, you put in your body measurements (you choose centimeters or inches) and there are handy photos which show you exactly how to take the measurements if you’re unsure. If you click the “fit adjustments” tab, there are additional measurements that you can enter (such as neck circumference and the distance from apex to apex). It’s completely optional, but I chose to enter them because I wanted my dress form to have as perfect of a fit as possible. Once everything is entered, you receive a custom pdf pattern and instructions delivered to your e-mail within 10-30 minutes. I think I received mine in less than 10 minutes. So cool!
Pro-tip: If you choose to enter the optional measurements, take a screenshot of them. If you create an account, the website saves your general measurements, but NOT the optional ones. Bootstrap Fashion offers a lot of other patterns besides the dress form, and if your measurements don’t fluctuate a lot, you can save time by not having to measure every single time you want to order a new pattern.
Did it look like the photo/drawing on the pattern envelope once you were done sewing with it?
Yes! But more importantly, it looks like ME! I have 2 other dress forms and I think the 3rd one is definitely the CHARM! My first dress form is a PGM dress form. I named her Sarita and she is seriously a GREAT quality dress form, but she’s smaller than me and has a longer torso. My other dress form is really a clothing shop mannequin that I purchased from Dress Barn when they had their going out of business sale. I named her Soledad (because I thought she must have been lonely in the shop lol). Her bust, waist and hip measurements match mine in circumference, but not in distribution, and she’s plastic, so I can’t pin anything to her. She’s great for displaying makes, but not so much for creating them. Also, Soledad and Sarita both have EXCELLENT posture, whereas I do not. My upper back is rounded and I think I also have forward shoulder. One of my biggest fitting challenges is the dramatic curve in my lower back. Soledad and Sarita don’t have that, so fitting the back of my body has been a challenge to say the least.
I often struggle with flat pattern adjustments because I can’t visualize what I am altering. Being able to pin it out for myself without having to take the garment on and off 50 times while trying to contort in front of a mirror is going to be immensely helpful.
Oh, and I’ve decided to name my new dress form B. That’s my first initial for my government name (Brittany). I was going to give her my first AND last initials, which would have been B.H. but then I had a chuckle and decided against it. For those who don’t know, I’m multilingual (German, Spanish, English), and in German, the abbreviation BH stands for Brusthalter which is the German word for bra (literally translated: breast holder). She’ll be great for FITTING bras, but I don’t think that should be her name lol. So I shall call her B, and B shall be her name :)
But seriously, one of the coolest things about this Bootstrap Fashion pattern is that you really can customize it to your actual SHAPE and not just your measurements. You look at photos of different postures, belly protuberance, shoulder slope and buttocks shape and select what looks most like your body. I suggest looking in the mirror or taking photos of yourself from the front, side and back and comparing them to the photos on the website. Be real, rather than wishful in your assessment of your body because putting this thing together is a LOT of work and the end goal is to be able to make CLOTHES that actually fit. Your body is your body and there’s no shame in that!
Were the instructions easy to follow?
Yes, the pdf instruction booklet is 44 pages and has great pictures. In all honesty though, I’m more of a video tutorial kinda girl. There is a short video tutorial on Bootstrap Fashion’s website, but there are also some really great tutorials on Youtube. I followed along with Diane Makes because I found her tutorial to be the most complete. You can find it here. I also watched one from Stephanie Farrell Focus which you can find here (and I consulted the pdf instructions if ever got confused on a step).
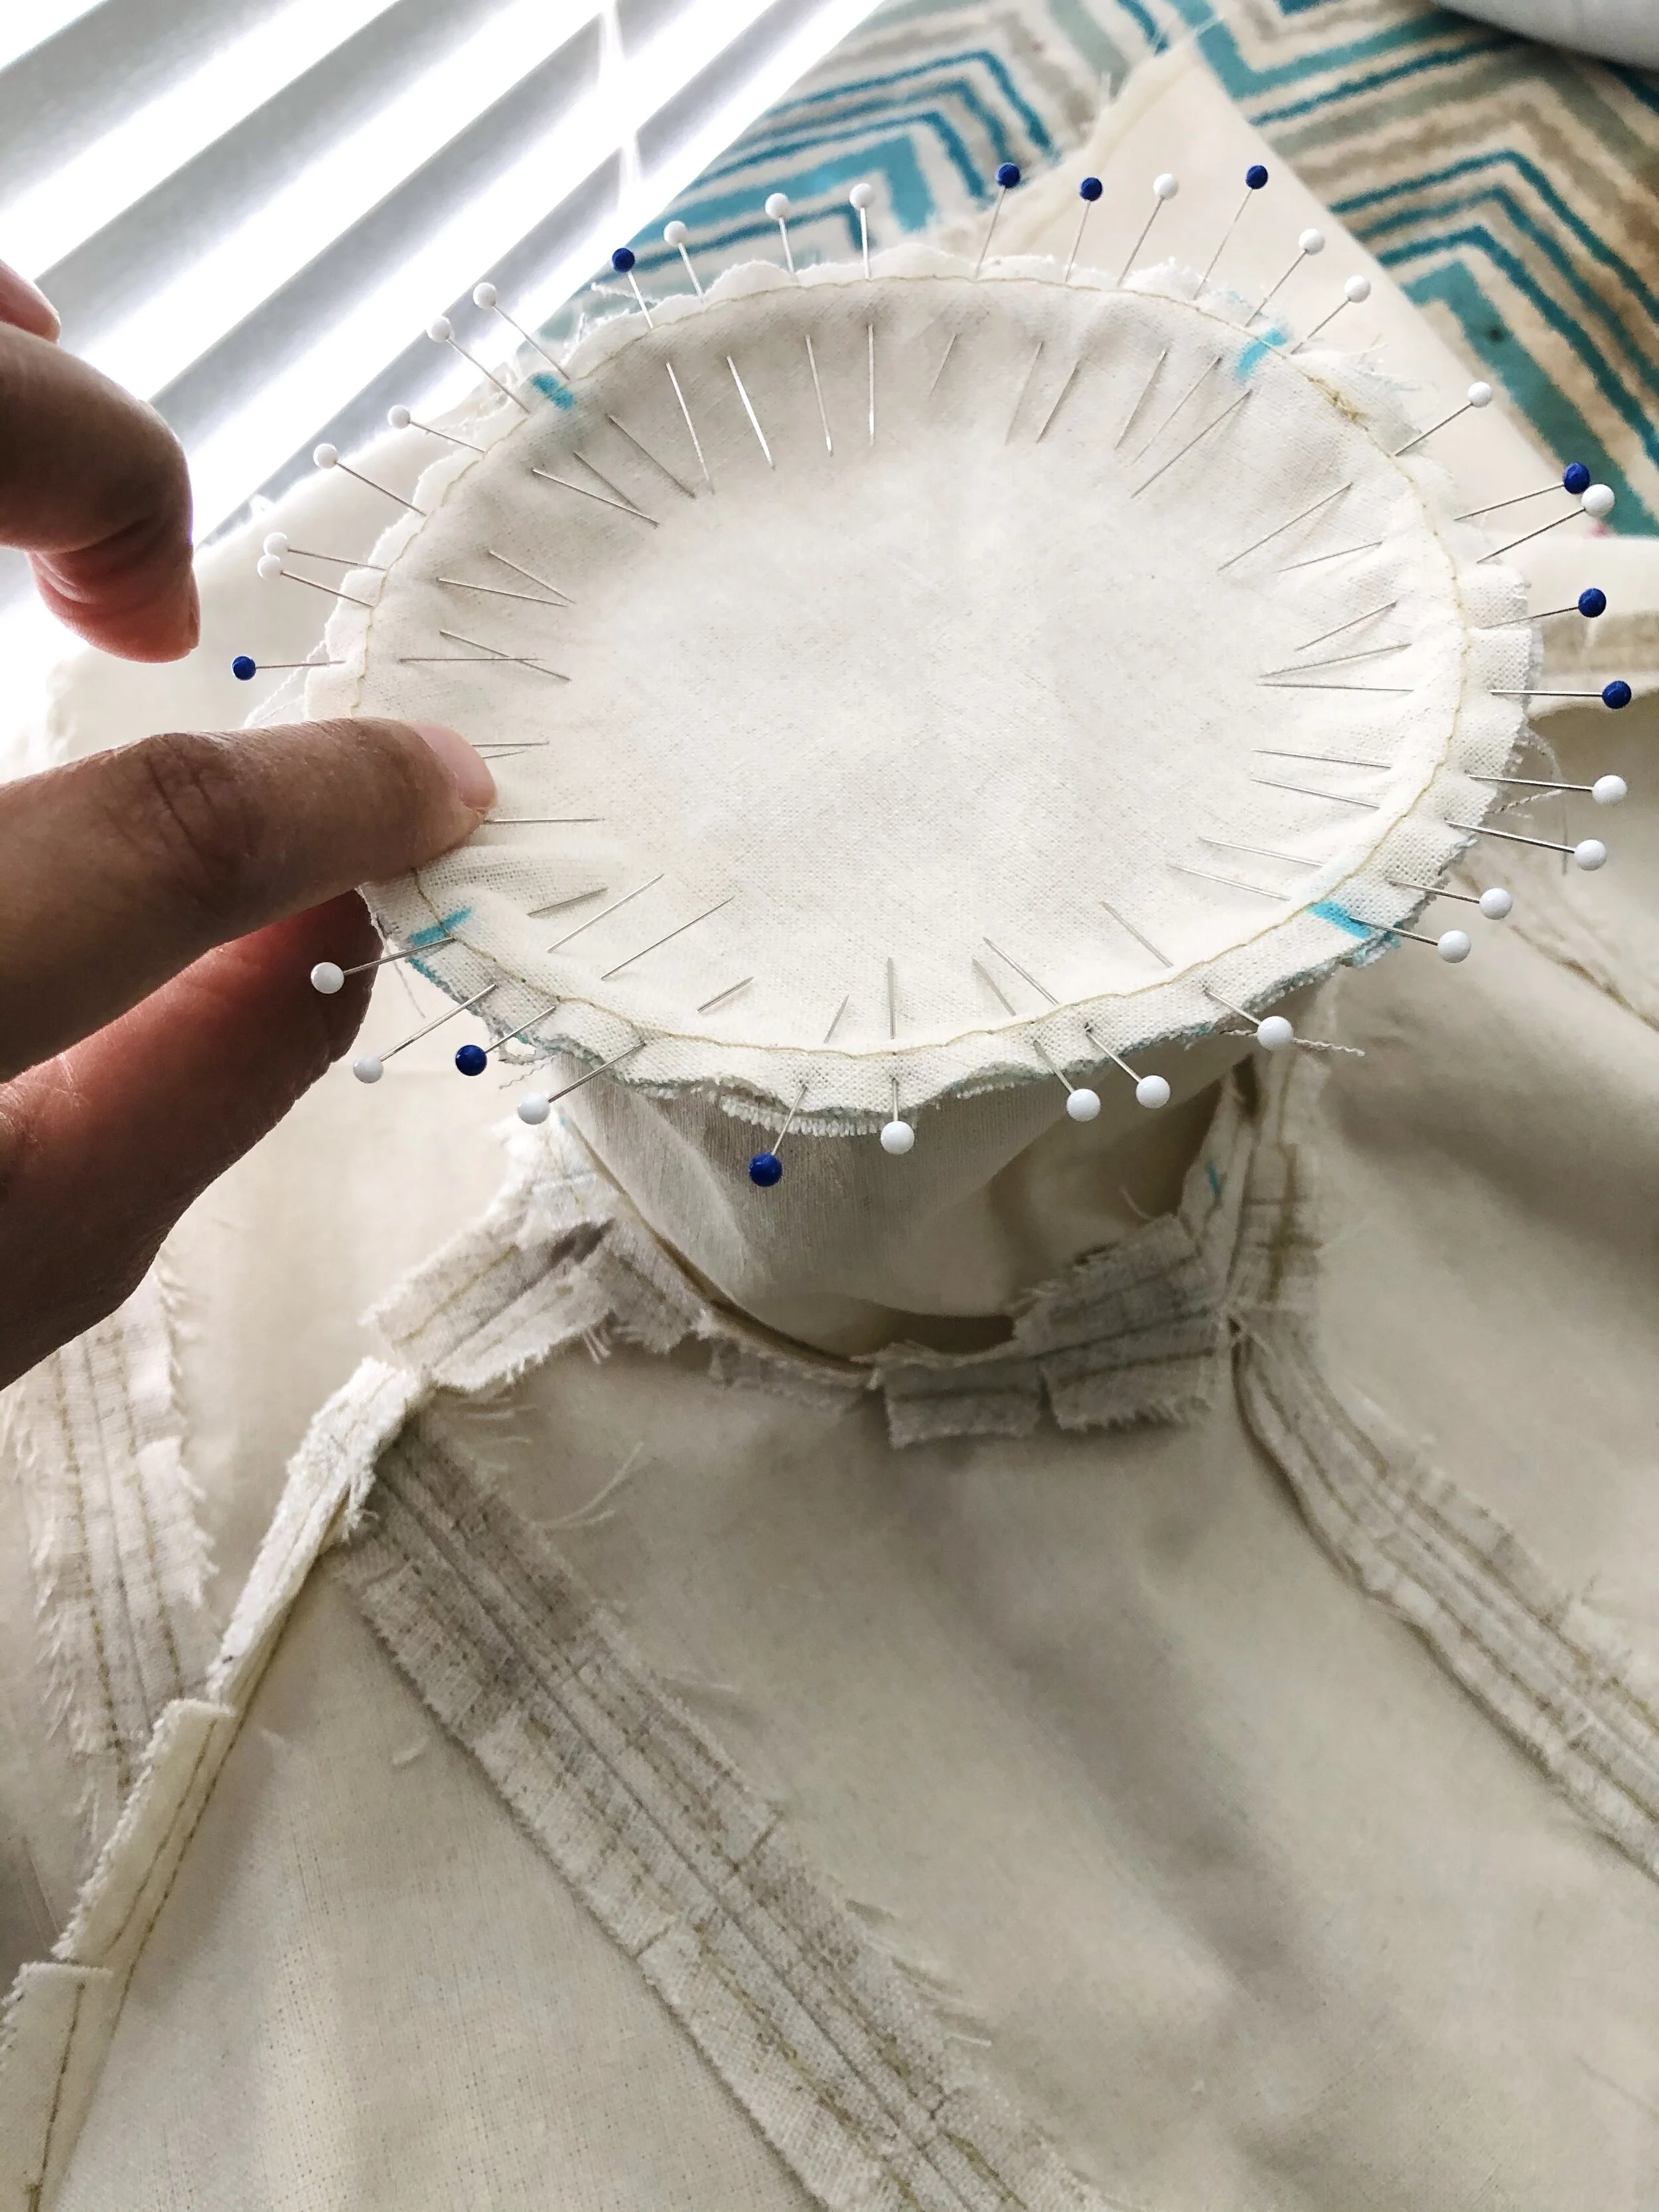
There really isn’t anything particularly difficult about the pattern. Beginners might struggle with sewing around the curves of the neckline and armhole covers, but that’s about it. It’s just time consuming. I don’t know about you, but I tend to get in the zone when I’m working on a project and I can forget to eat, drink water, stretch, etc. Diane sets a timer in her tutorial to remind herself to drink water and stretch. I love that idea!
I definitely rushed to finish this project because I’m a teacher and summer vacation is ending soon. I really wanted to get her finished before heading back to work (whether virtually or in person). From cutting to stuffing, it took me less than a week, but I was working on this thing like it was my full time job if you know what I’m saying.
What did you particularly like or dislike about the pattern?
I like that it has an inner support system to help it keep its shape. The instructions have you quilt it to give it additional support. This was my first time quilting anything and I thought that part was really fun.
As of now, I don’t dislike anything about the pattern. I hope to write another blog post once I’ve had the chance to really use it.
One thing that was a little challenging was the stuffing process. The support piece divides the dress form in half up the middle, so when you stuff it, you have to alternate back and forth to try and equally fill both sides of the dress form. I did my best, but I’m not sure it’s 100% even. I don’t think it’s such a big deal though. I know my actual body isn’t 100% symmetrical either lol.
Fabric Used:
I don’t actually know what my fabric is. I’m pretty sure it’s home decor fabric, but I purchased it secondhand from a local sewing studio here in St. Louis called the City Sewing Room. The fabric for the inner support is a thick twill, also from the City Sewing Room. I paid 1 dollar per lb. It was a steal.
Pattern alterations or any design changes you made:
No pattern alterations needed as this is custom fit to my measurements.
I did make a few minor construction changes though.
Firstly, I sewed in muslin instead of using fusible interfacing. I didn’t have any fusible on hand and I’m currently boycotting JoAnn’s, Hobby Lobby and Michaels in support of @blkmakersmatter. And like I said, I’m going back to work soon and wanted to finish this project quickly. That meant I didn’t have time to order the interfacing and wait for it to come in from Amazon or another online shop. I think it worked out fine, but it was tedious to sew it to every. single. piece.
Secondly, my fabric was fraying a lot and I was worried about there not being any seam finishing, so I opted to topstitch my seam allowances down. In hindsight, I do not recommend this. I should have read the instructions in full first because I ended up having to seam rip the center front and center back topstitching because those need to be sewn to the inner support piece. I also think the topstitching might be the reason for the lumpy looking breasts, but I’m too lazy to unpick the rest of the seams and it’s not such a big deal.
Thirdly, I followed along with Diane Makes for an alternative method of sewing in the zippers to the base cover. Her method is more time consuming, but offers a cleaner finish than the method in the instructions. If I were to do it again, I wouldn’t bother. Nobody’s going to see the inside anyway, so it doesn’t matter if the zipper tape is visible on the inside. And by this point in the process, I was SO ready to be done. I would also recommend using long zippers. Mine were 7 inches, which is what the pattern recommends, but it was difficult to clear the zipper stops. A longer zipper would eliminate that issue and you can cut off the excess once they’re installed.
Would you sew it again? Would you recommend it to others?
I’m very glad that I sewed it, but I hope I never have to sew it again lol. This should hopefully be a one and done kind of project. I absolutely recommend it to anyone whose body measurements, shape and/or posture is outside the sizing of standard dress forms. If the length of your torso matches standard dress forms, but you have a full bust or butt, you can likely save time by ordering their customizable dress form COVER, which you can place over a standard dress form and pad it out to match your measurements. I’m only 5’1” and my torso is too short and my shoulders too narrow for that to have been feasible for me.
Conclusion:
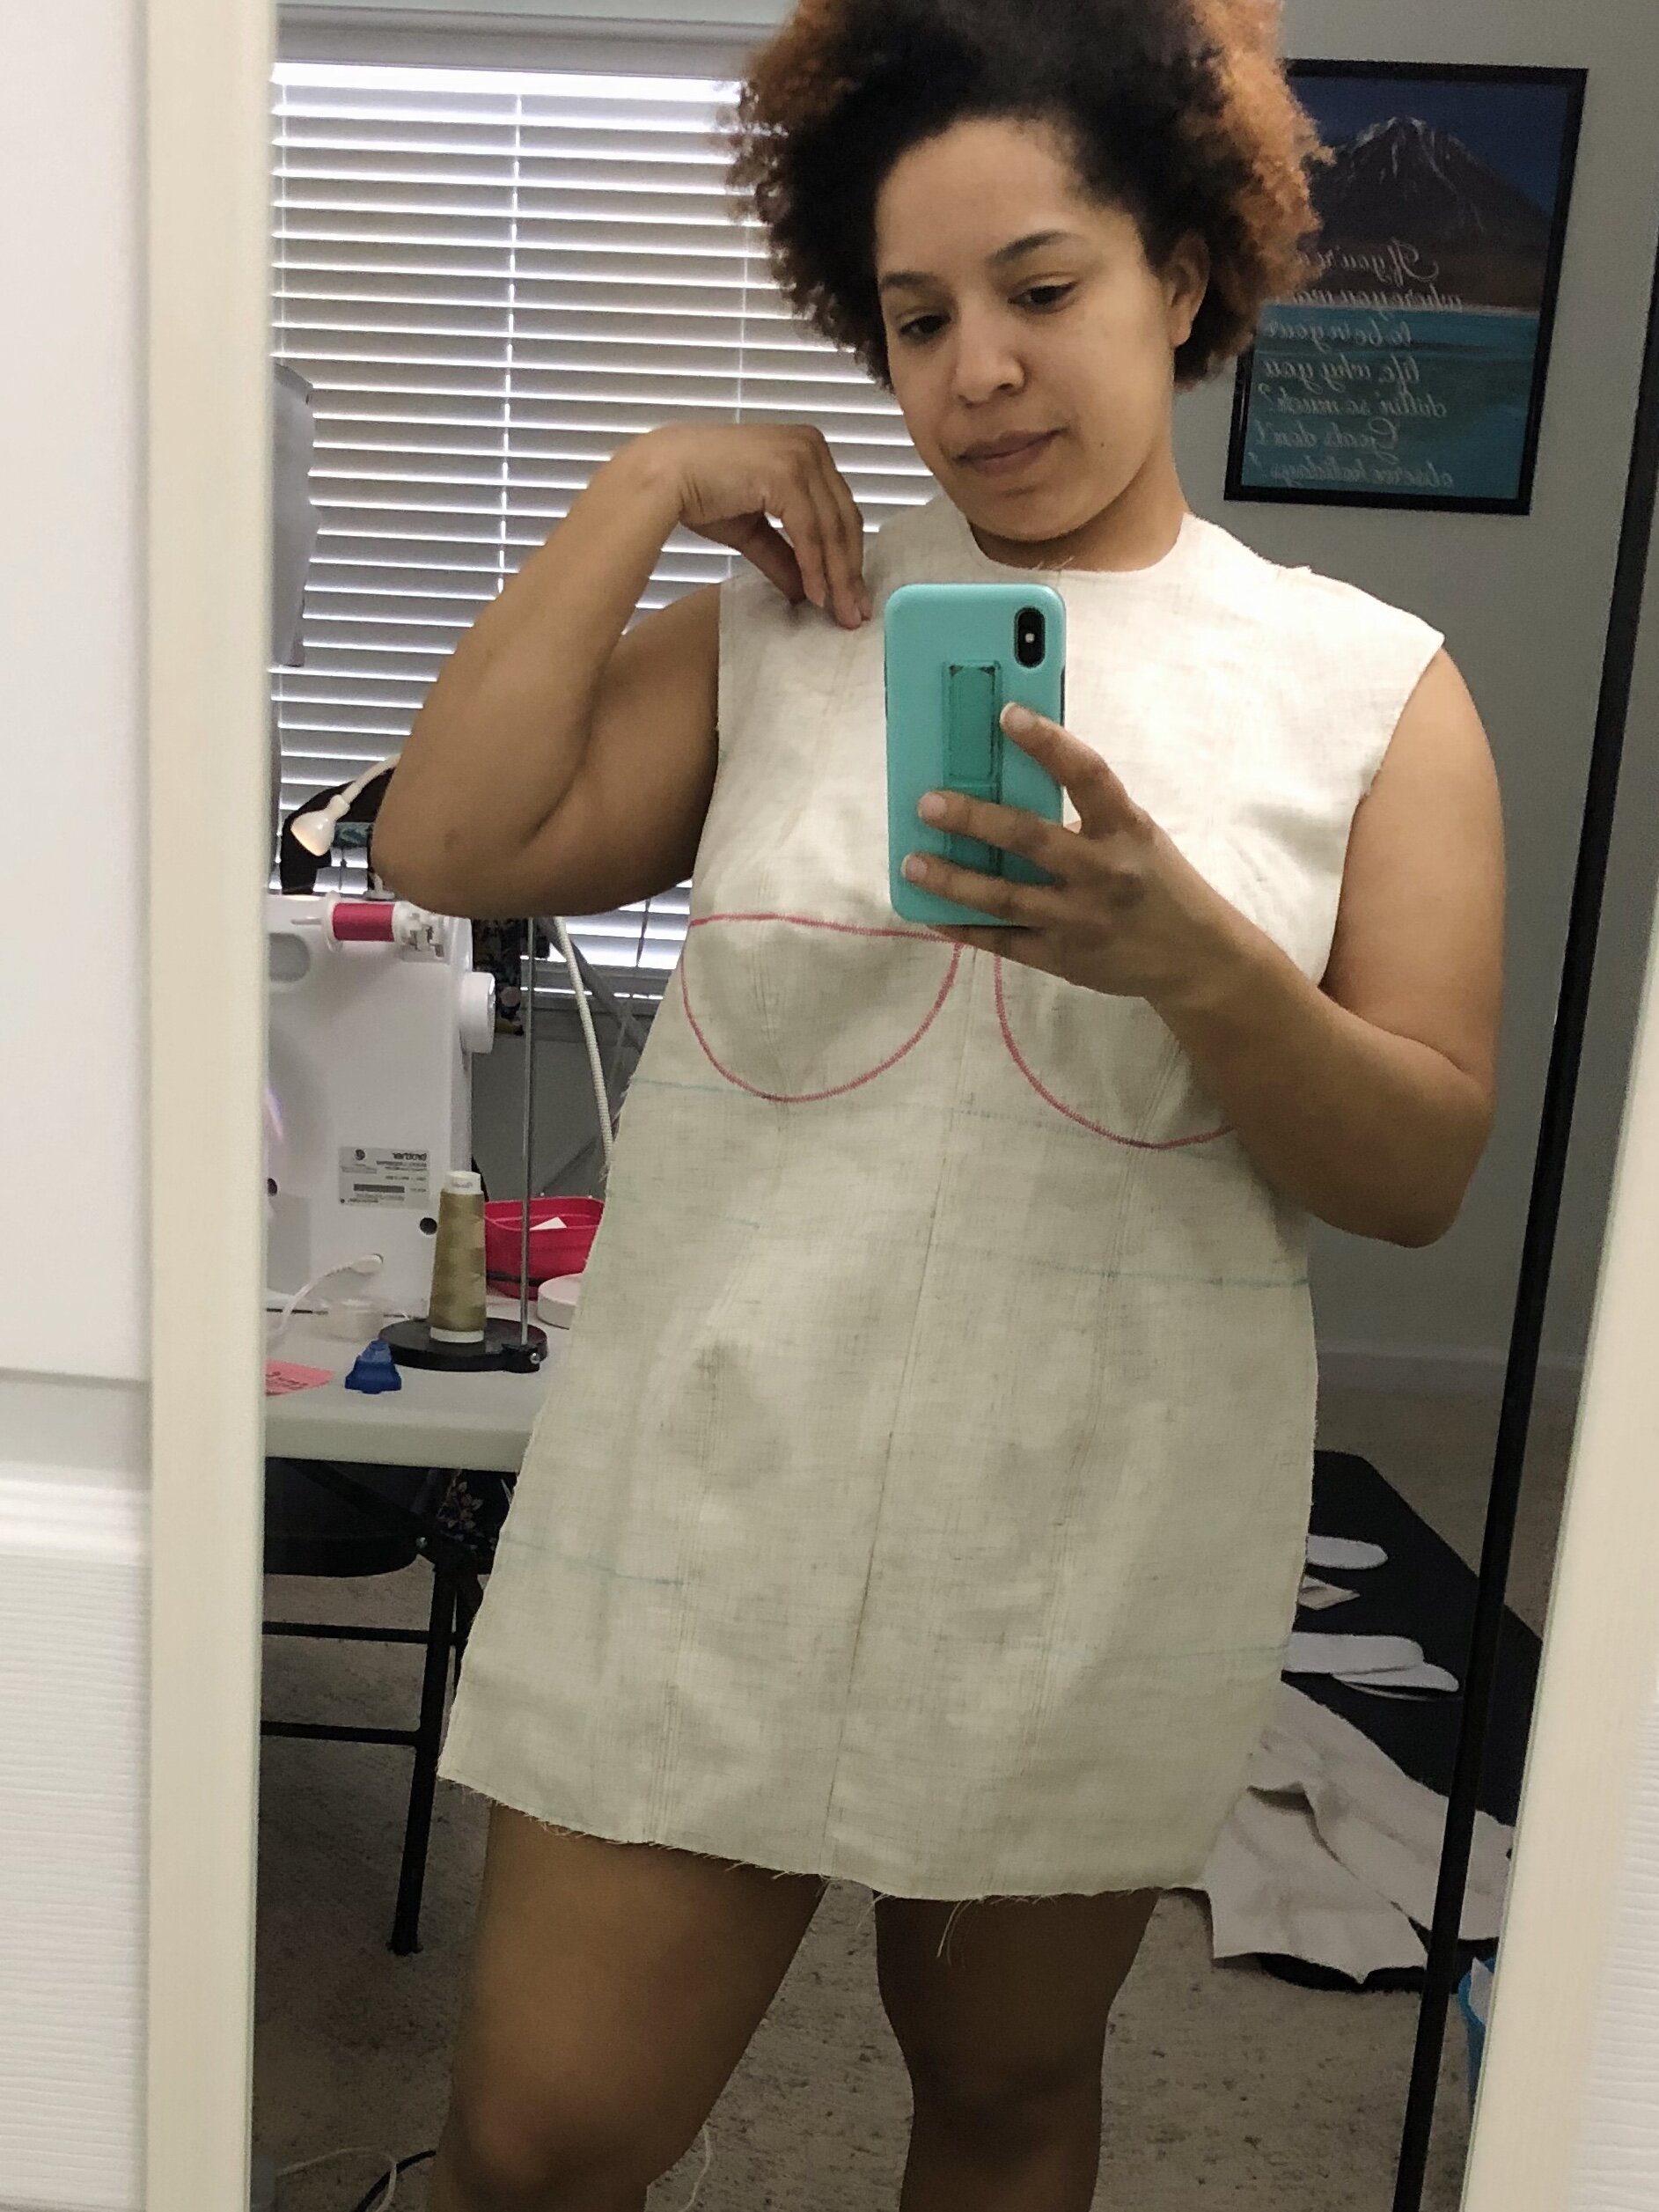
I’m incredibly pleased with how this project turned out. Looking at the side by side photos, I would say she’s not a perfect body double, but she’s pretty stinking close! You can see on the side profile how the curve of her back is similar to mine.
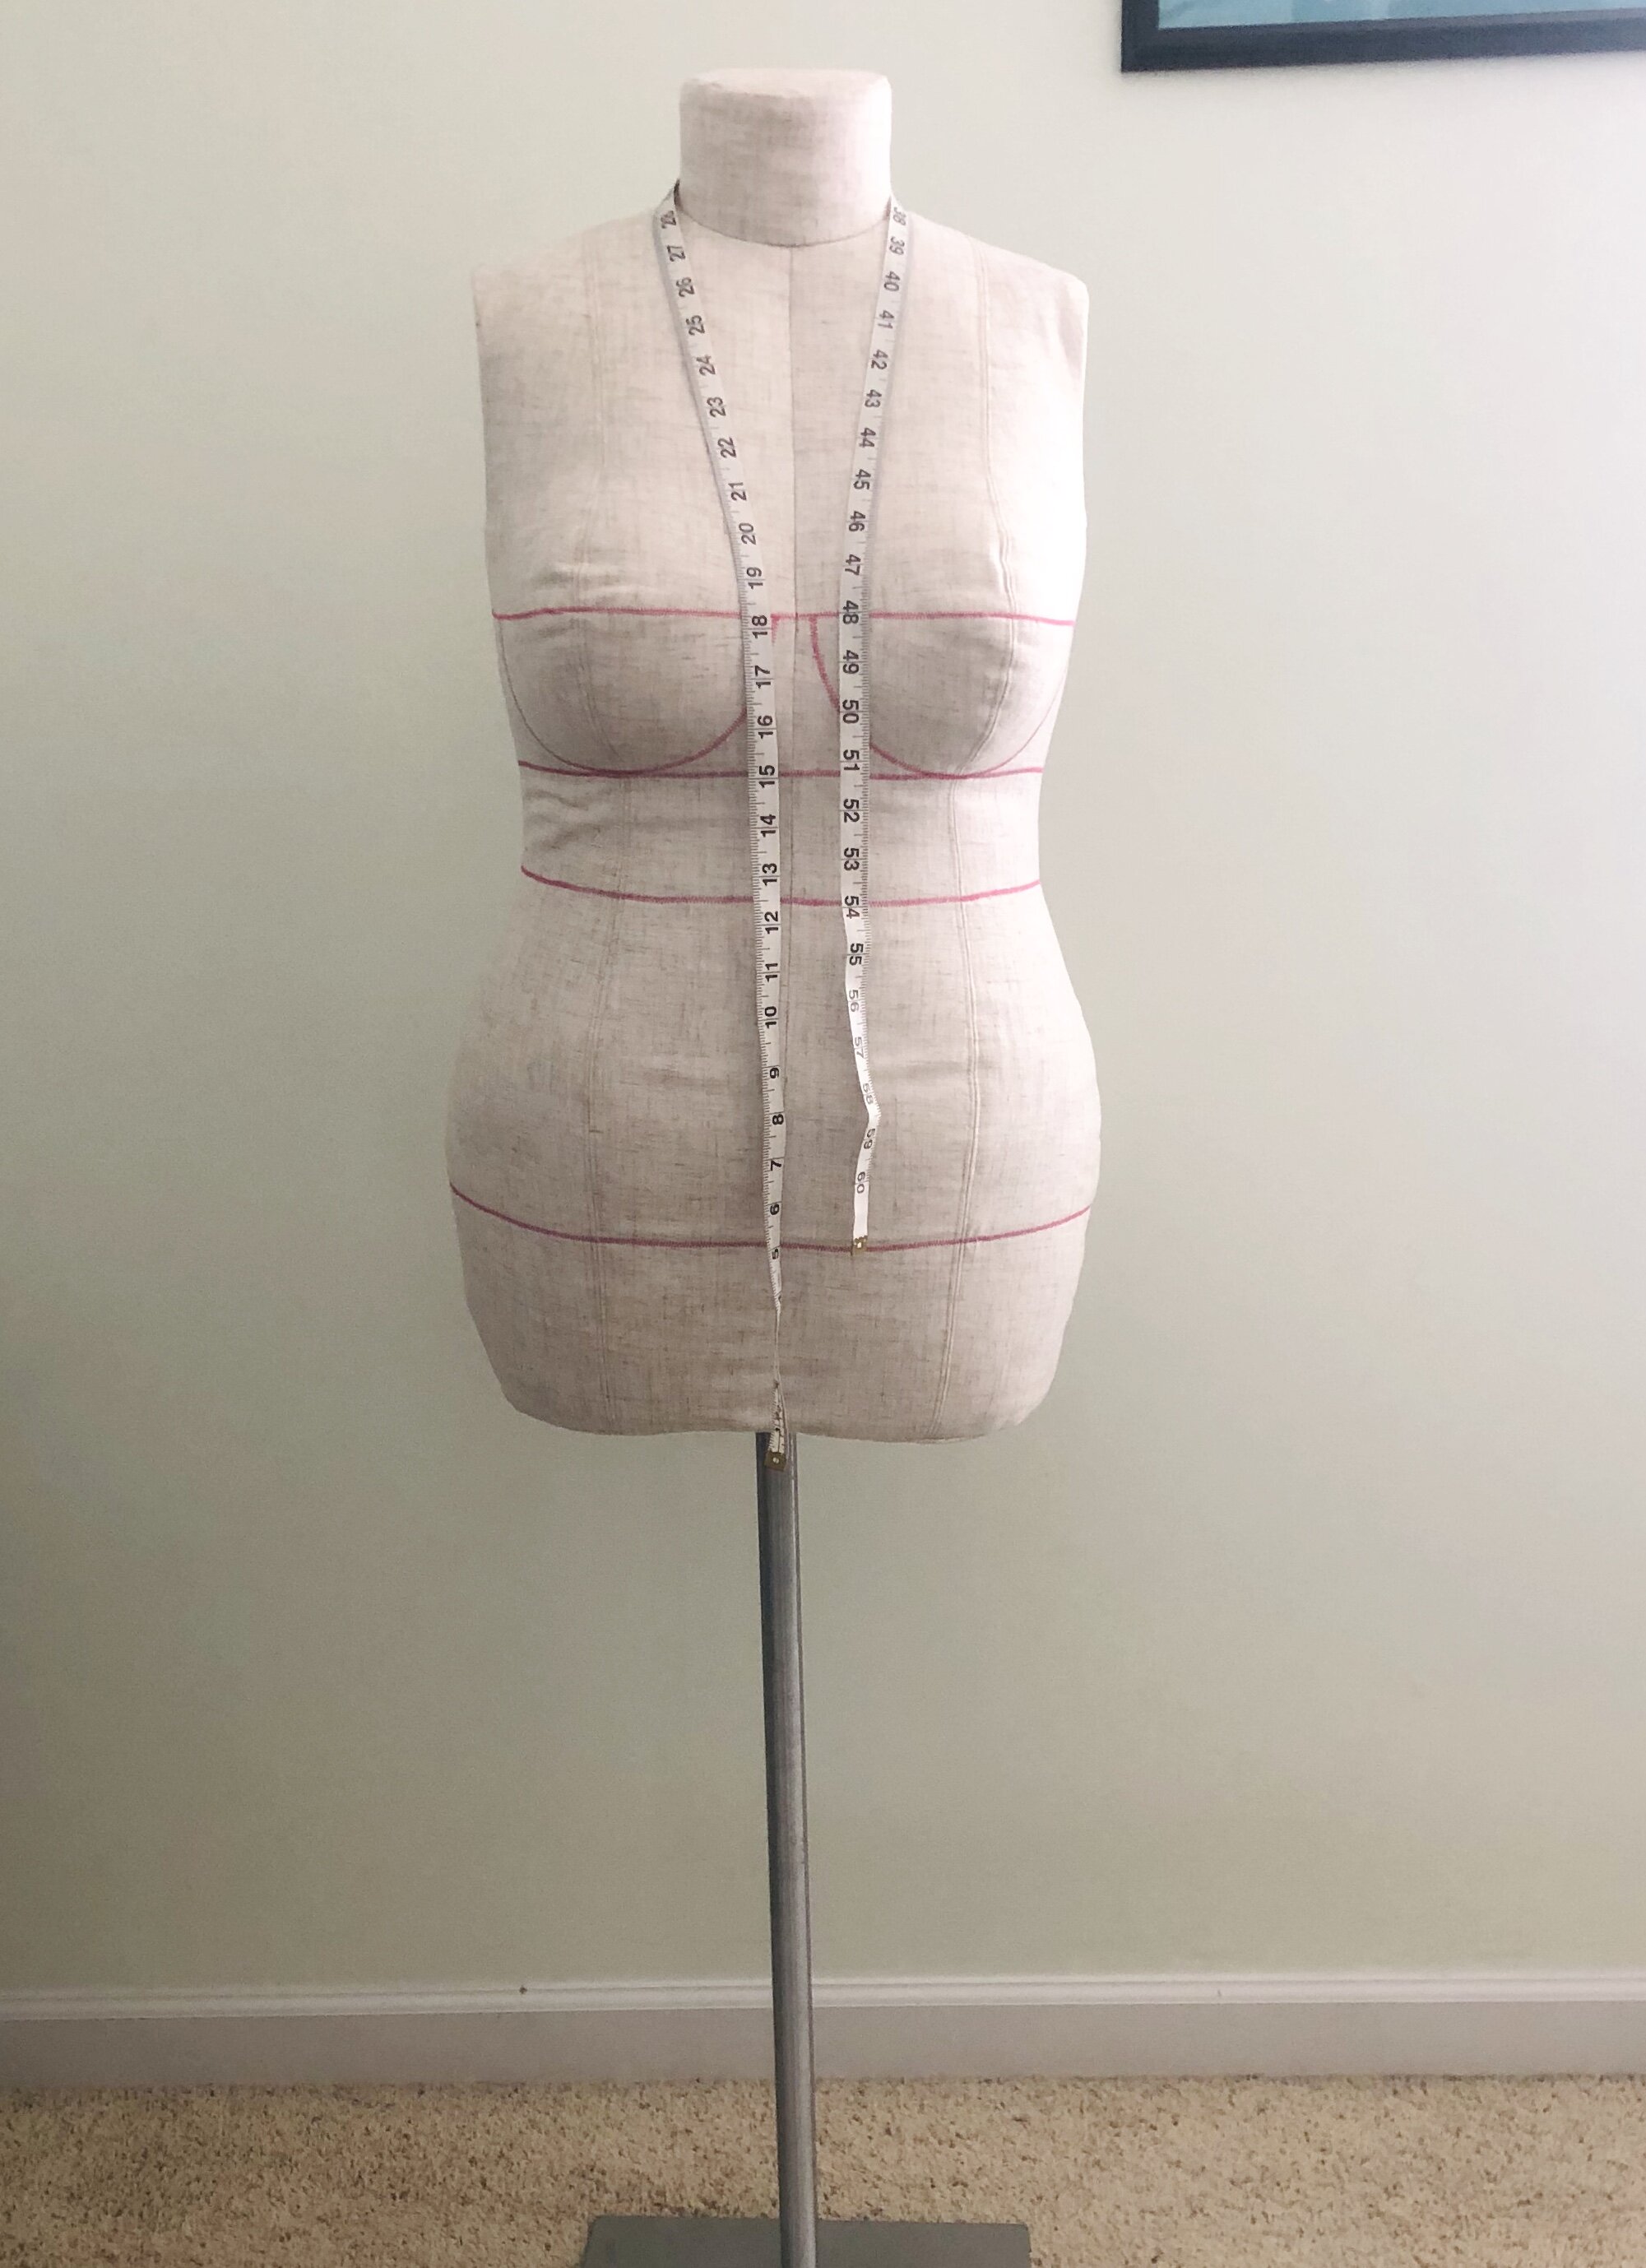
I was a little bit worried that the finished dress form would be really squishy, but she’s actually quite firm. Not as firm as a PGM dress form of course, but not soft like a throw pillow either. I used nearly 5 regular size bags of polyfill and I might add just a bit more. I like that the there are holes at the bottom so you can add more stuffing if you need to.
I was also extremely pleased with how affordable this project was. I didn’t do a complete cost breakdown because as I said, I had most of the the items I needed already on hand, including the stand oddly enough. Soledad is chilling on the floor now because I needed to repurpose her stand. Sorry homegirl lol. The fabric cost me next to nothing, the PVC pipe was less than 3 dollars at Home Depot. The most expensive thing for me (aside from the pattern itself, which I got on sale for 24 dollars) was probably the stuffing.
I cannot wait to use my new dress form to start fitting patterns!! I also ordered a raglan sleeve dress sloper from Bootstrap Fashion using the same measurements as I did for the dress form. I plan to sew that up here pretty soon. Hopefully it fits me and B like a glove!