
Thrifty is Nifty :)
It's been awhile since my last blog post. What can I say, life happens lol. Anyway, I'm on Spring Break now so I've been doing what I love to do when I'm not teaching...sewing! I also like to get out of the house from time to time, but somehow that always seems to involve spending money. Since I'm trying not to break the bank, I've been keeping myself in check by browsing my local thrift stores. There's always something interesting to see there even if I don't spend any money at all while I'm there. On my last few trips I've found some really great stuff! I picked up some sewing patterns and fabric at my local Savers and I hit the JACKPOT when my husband spotted a BROTHER SEWING MACHINE at the Goodwill!! I effing love my new machine! It came with a walking foot already attached and all the other feet and attachments were there as well. It even came with a carrying case! It was a little dusty, but for 50 bucks I'm not complaining! I gave it a scrub and have been breaking it in ever since. It works like brand new!


Anyway, while we were in the Goodwill, I had a look in the clothing section and stumbled upon this cute green microsuede cardigan. I promise it's green, I don't know why it looks blue-ish in the pictures lol. I paid 4 dollars and 50 cents for it and thought it would be fun to try and transform it. I love the color (and even the style), but I felt it was just too long in the front for my 5 foot 1 frame and I feel like I look matronly wearing it. Nothing wrong with matronly, but that's not the look I was going for.

BEFORE PIC #1:
So, I thought about what I wanted to change about it and my first thought was that I wanted to be able to close it. I get cold very easily and I like most of my cardigans and jackets to have some sort of closure so I don't freeze. My first idea for a closure was to wrap it and add a button. I decided to scratch that though because I didn't have a button on-hand that matched the fabric well and I was worried I would destroy the fabric trying to add a buttonhole.

BEFORE PIC #2:
So then I decided to just go ahead and address the length issue first and come back to the closure later. I kept most of the length in the back and just lopped off the front pieces that were hanging down and re-hemmed the whole thing. I tried it on and looked in the mirror and that's when I knew what kind of closure I would go with. A zipper! Seems so obvious, I know. But zippers still scare me a bit and this was my first time installing a separating zipper. Thankfully, YouTube came to my rescue and I followed Professor Pincushion’s tutorial and it went in no problem! (I still need to remove my basting stitches, but that's a problem for another day lol). I did have to cut off the lovely flaps in the front of the jacket and that was a bit nerve-wracking. I was worried I would accidentally cut off too much and ruin the whole thing, but thankfully I cut off just enough and the zipper went in beautifully. I ran into some problems making the collar look even on both sides and had to use my seam ripper several time, but it was worth it. I love my finished jacket!! I think the length suits me much better and it just feels more my style. And I love that I can zip it up if I get cold, which will inevitably happen anytime I'm in a restaurant or a movie theater lol.

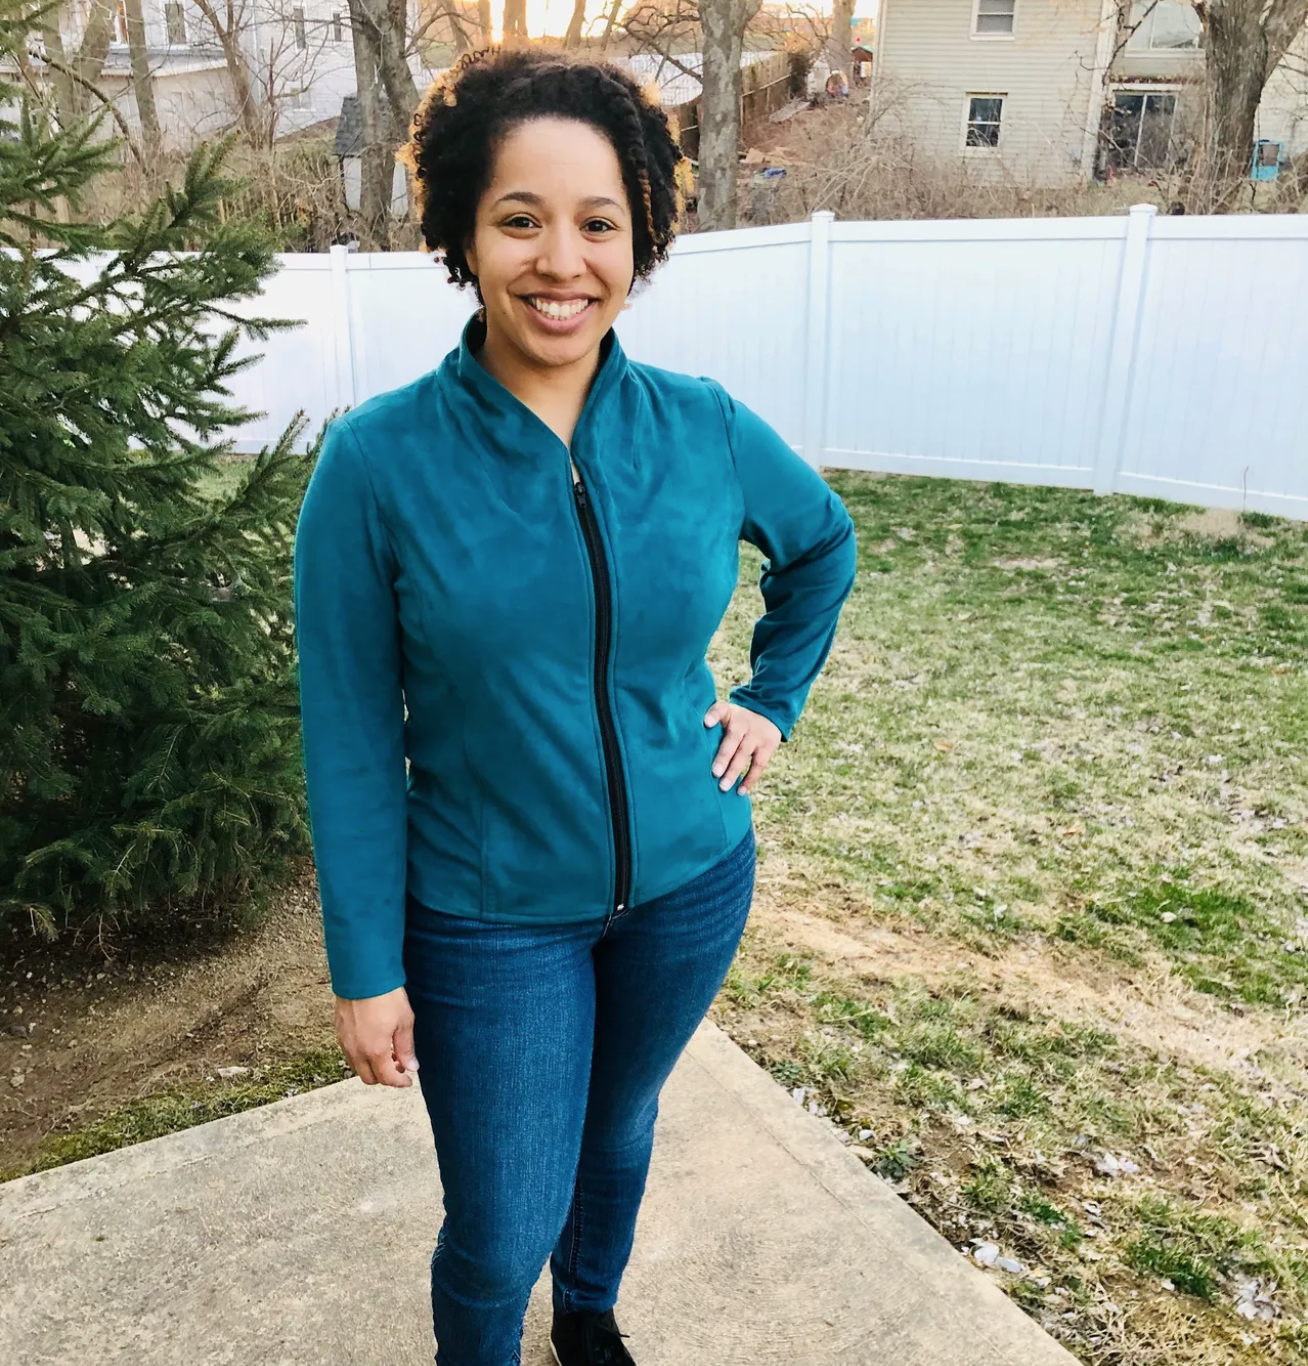
AFTER PIC #1
My only complaint is that it doesn't have pockets, but I don't want patch pockets on this jacket and there's NO WAY I'm going to seam rip the serged seams on the inside of the jacket to try and install them, so I'm leaving it the way it is and I'm incredibly pleased with the final result. Not only is it cute, but it cost me next to nothing! If I add the 4 dollars I paid for the zipper, the jacket cost me a total of 8 dollars and 50 cents. I think we can all agree it looks more expensive than that! Oh and I thrifted the pants too. I got the jeans for 4 dollars and then hemmed them because they were way too long. I can't believe I used to pay people to hem my pants!

AFTER PIC #2
AFTER PIC #3